Well, I finally got around to getting the camera out so I could take some pictures of my preferred method of making cards to play the Revised 4th Edition of Talisman with!
In the other articles from HallowKnight and Cider Vampire they concentrate on printing fronts and backs for the cards and then marrying the two together to make a set of cards, which can be a little tricky. I, of course, take the easy way out and use some sticker sheets and a copy of the Talisman Upgrade Pack, which gives you a fair amount of cards to *cough* destroy *cough* and it’s reasonably cost effective. Those of a nervous disposition should not read on!
The operation is really straight forward, so I won’t blather on too much about the process as it should be easy enough to follow from the pictures. Basically, it’s print, cut, stick, play…
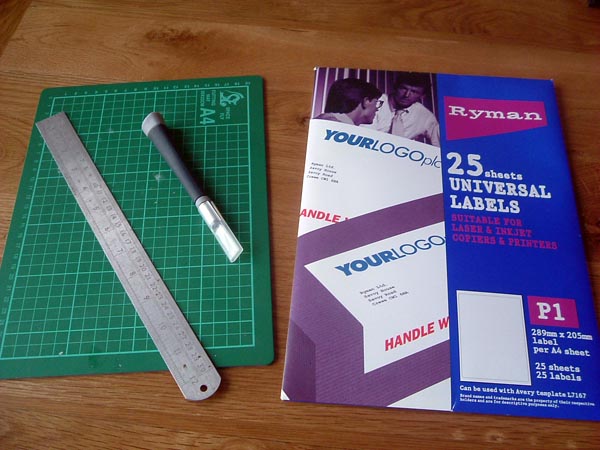
First off you will need your tools – some sticker sheets, a cutting mat, craft knife/scalpel and metal ruler. Be careful not to do what I did last year when I was making 4th Edition cards and cut through your finger with a craft knife – it’s not very nice and it makes a mess of your cards!
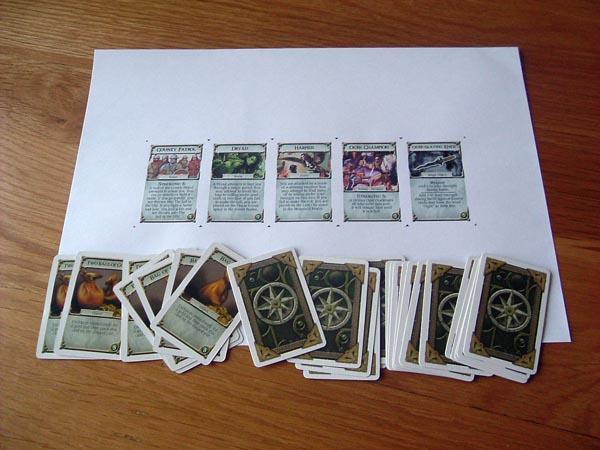
Next you will need to print out the cards you want to make onto the sticker sheet. I’ve only printed five in this example, but I think for A4 you can maybe print up to 18 on one sheet. You’ll need to get your donor cards ready too! I’ve selected Bag of Gold cards for this particular procedure. Mwuhahahahahaaa!!!!
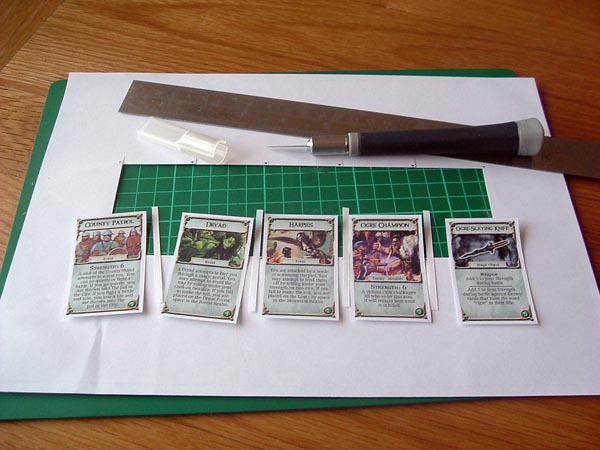
Carefully cut out the card fronts and remember they will need to be smaller than the actual card otherwise they will either stick out or snag. I have used the inside of the card corners as a guide for this. Did I mention that you should be careful when you do this?
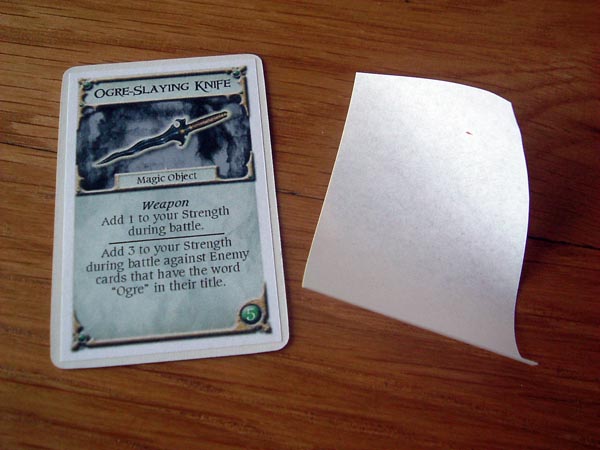
You will probably have to use the blade to get the sticker from the backing sheet, so be careful with that, and then stick them together. With the last lot of cards I made, I snipped the corners off as well in order to help prevent them getting snagged, but decided to leave these to see if it actually makes a difference. I shall report back on that.

Then all you need to do is add the finished cards to your deck! Previously I had the sticker sheets made up by a printer as I was worried about ink bleeding because I use an inkjet at home. I will see if it makes much difference, but I can always remove the front and print another if it all goes wrong. I think inks are a little different nowadays, but I would doubt they would take being handled after you’ve had a chicken dinner or if you are playing in the bath!
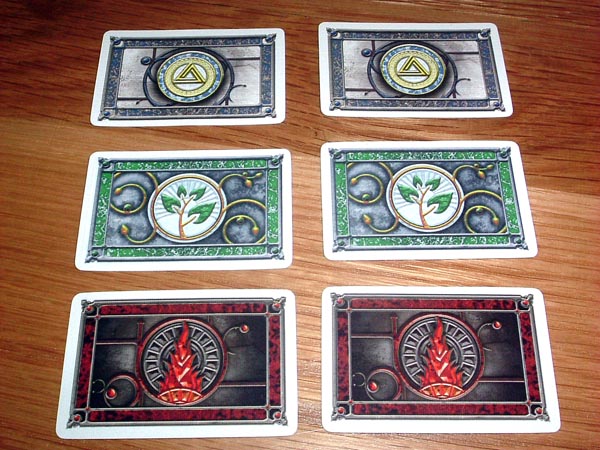
Another cool thing about the Upgrade Pack is that you have some spare Alignment cards. By using a couple of those, and a printout of JC’s Neutral Alignment design, I now have 6 Alignment cards that can now be used in the game. Good/Evil (*unstickered) x 2, Good/Neutral x 2 and Evil/Neutral x 2. I’ve gone down the conventional route instead of using the cardback that JC made to go with them and they look pretty cool!
So there you go, easy peasy… Obviously it is easier to use the Upgrade Pack as it has a large amount of base cards, but this might be tricky in future if I want to add Treasure cards or Warlock Quests. It would be cool if FFG made some blanks for people to use for this, but I suspect it would only end up marginally cheaper than having them printed with fronts on given the volumes involved.
I am considering getting some of the “Mini Euro” card sleeves from Mayday Games which might help with the longevity of the home made cards. I’ve never used card sleeves before though, so am still pondering that one.
Anyway, that’s that for now. If you have a different way of making cards up at home that is not covered at Talisman Island, why not write up a tutorial for it and take some pictures along the way. I am sure people would love to see how it’s done!